Aan de slag
Welkom bij Shootstack, het platform voor fotografen om je fotoshoots af te leveren aan klanten.
Deze guide helpt je om aan de slag te gaan met Shootstack. We laten je zien hoe je je account instelt, je eerste galerij creëert en deelt.
Gerelateerd
Account aanmaken
Ga naar de website en klik op Aanmelden. Vul hier je gegevens in en creëer je account. Je ontvangt een email om je account te verifiëren.
Zodra je e-mailadres is bevestigd, word je stap voor stap meegenomen in het onboarding proces om je account en voorkeuren in te stellen.
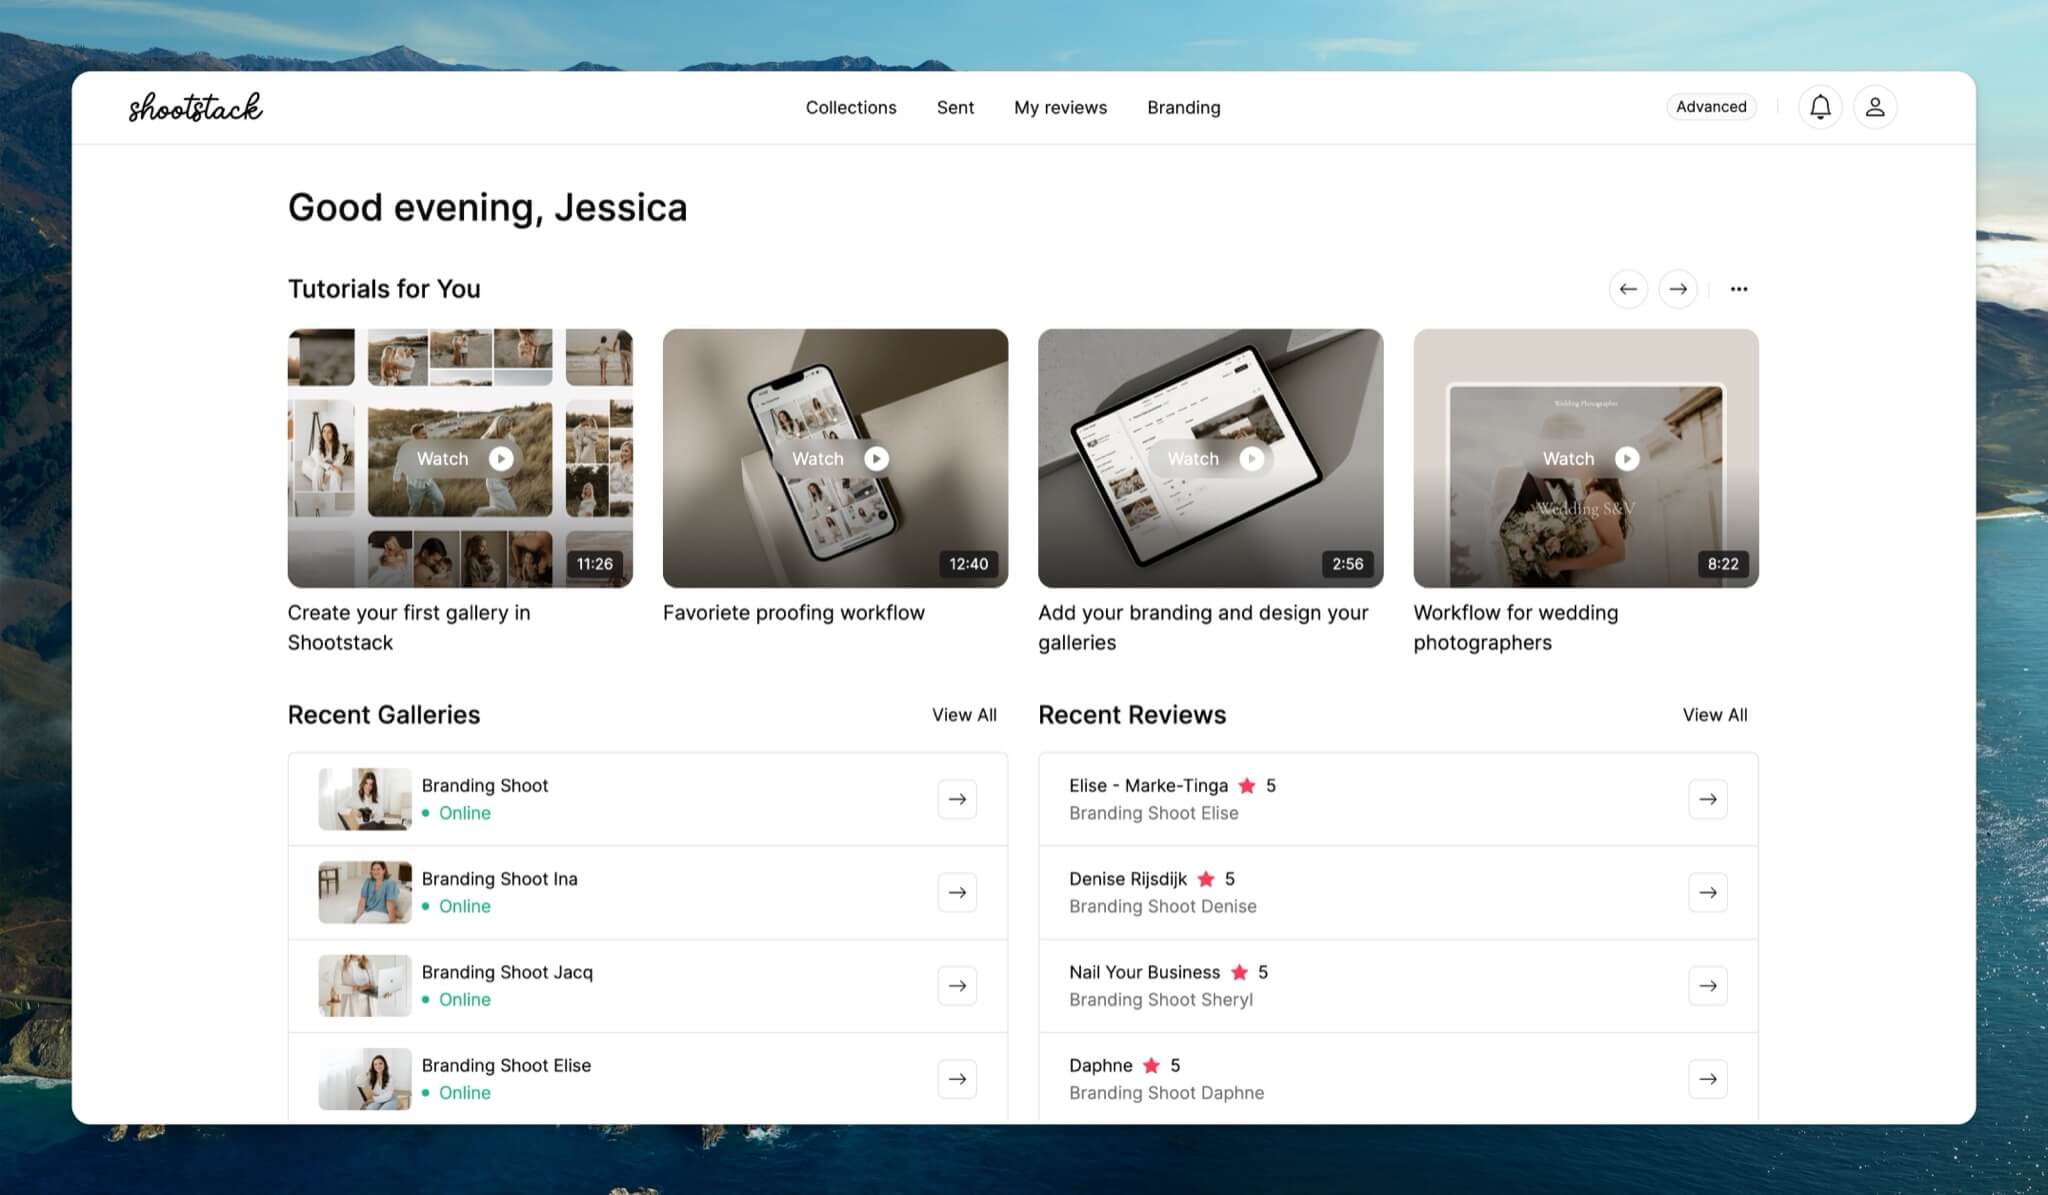
Home screen
Op het home screen navigeer je eenvoudig tussen verschillende functies, zoals Collecties om je foto's te beheren, Verzonden om gedeelde galerijen te bekijken, Mijn reviews om feedback van klanten terug te lezen, Huisstijl om je merk te personaliseren, en Account om je gegevens aan te passen.

Huisstijl Instellen
Stel vervolgens je huisstijl in. Hier kan je jouw logo en watermerk uploaden, je eigen kleurpaletten aanmaken en social accounts toevoegen. Bij legal kan je de link naar je algemene voorwaarden en privacyverklaring toevoegen.

Creëer je eerste collectie
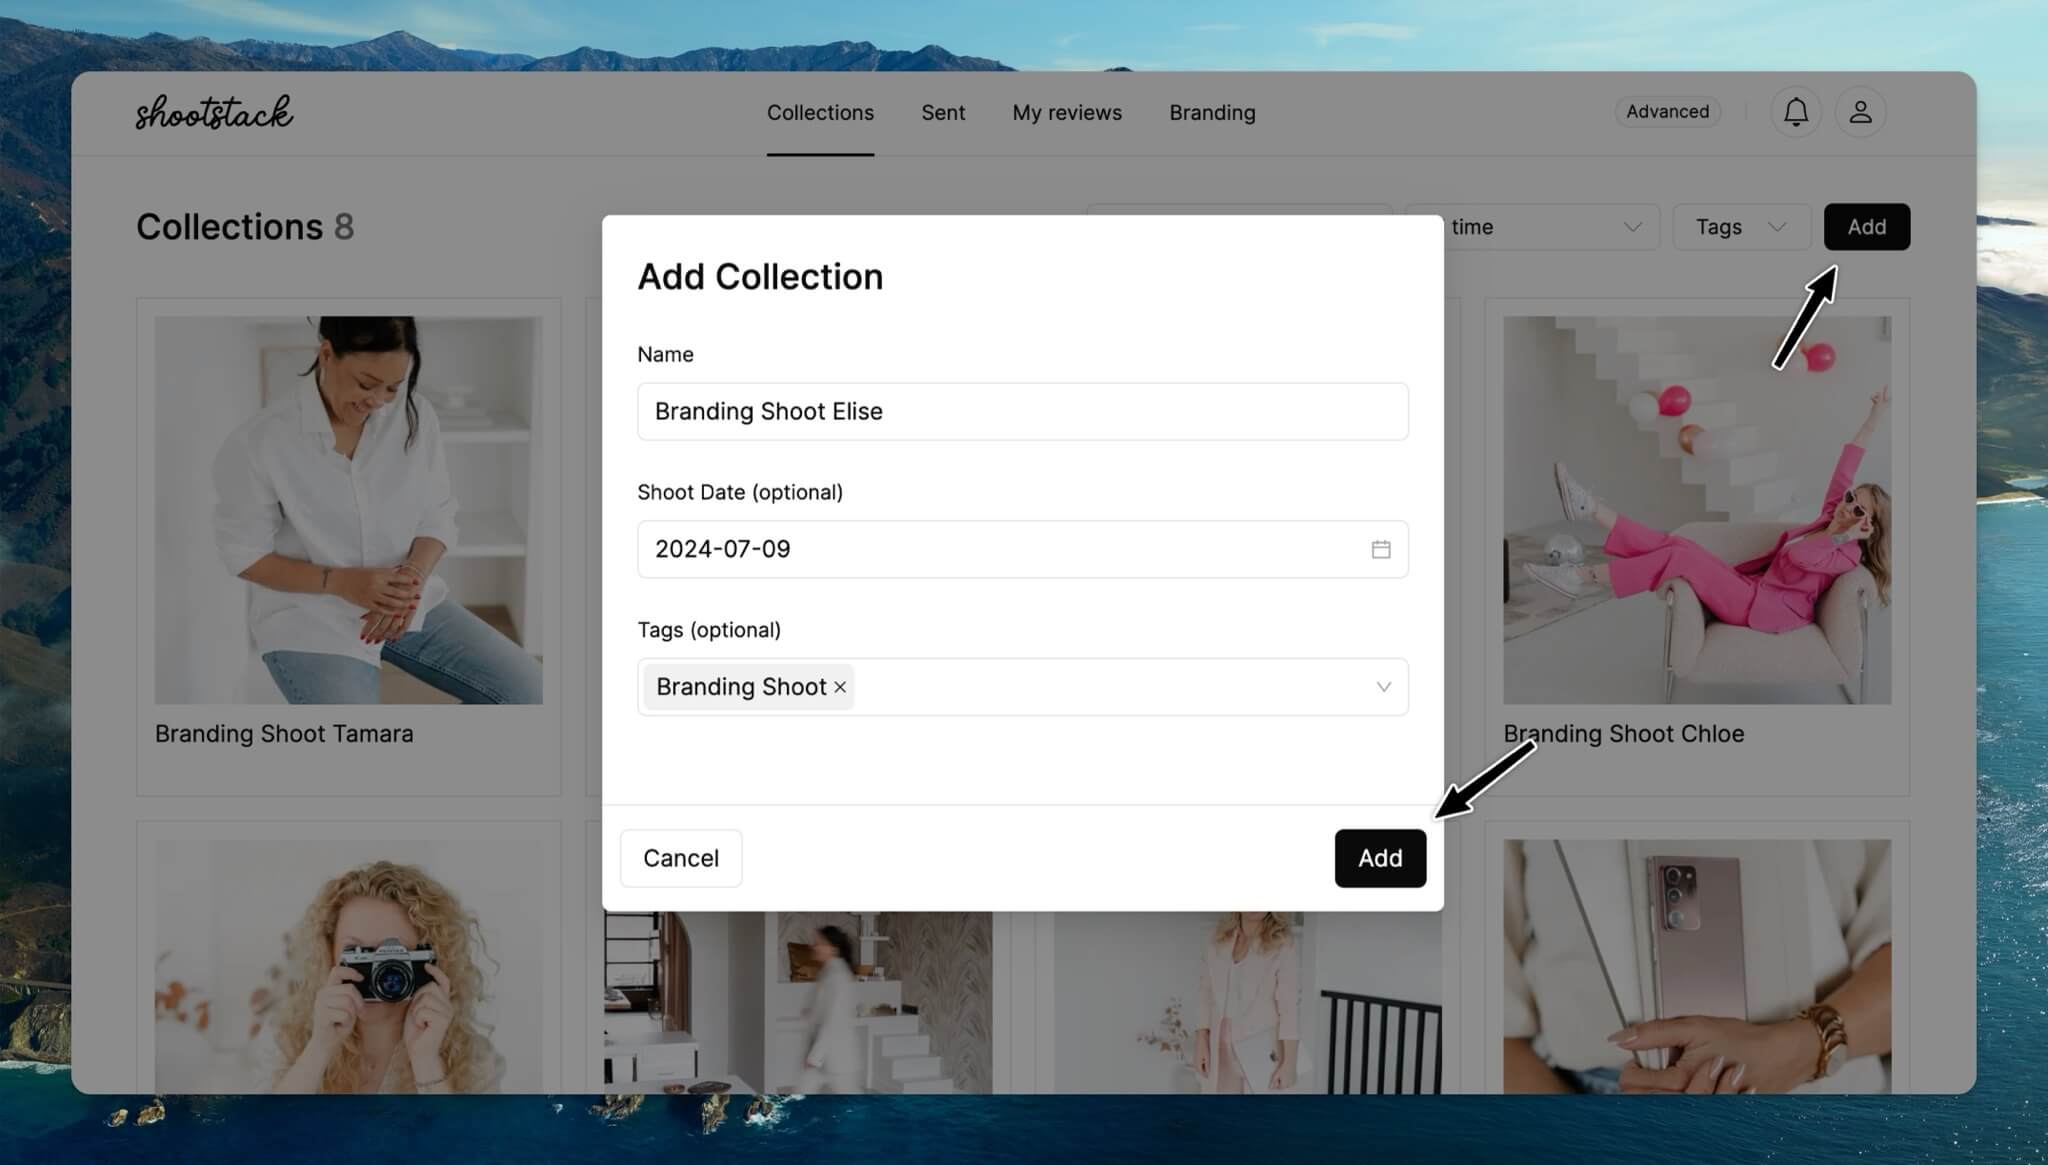
Om je eerste collectie aan te maken ga je naar Collecties en klik je op Toevoegen.

Klik op Foto's Toevoegen en upload je foto's door ze te selecteren of ze te slepen in het upload veld. Zodra het uploaden klaar is kan je de foto's bekijken, verwijderen en sorteren. Sorteer de foto's handmatig door ze te verslepen (houd ctrl of shift ingedrukt om meerdere foto's te selecteren) of klik op de button Sorteren.

Galerij instellen
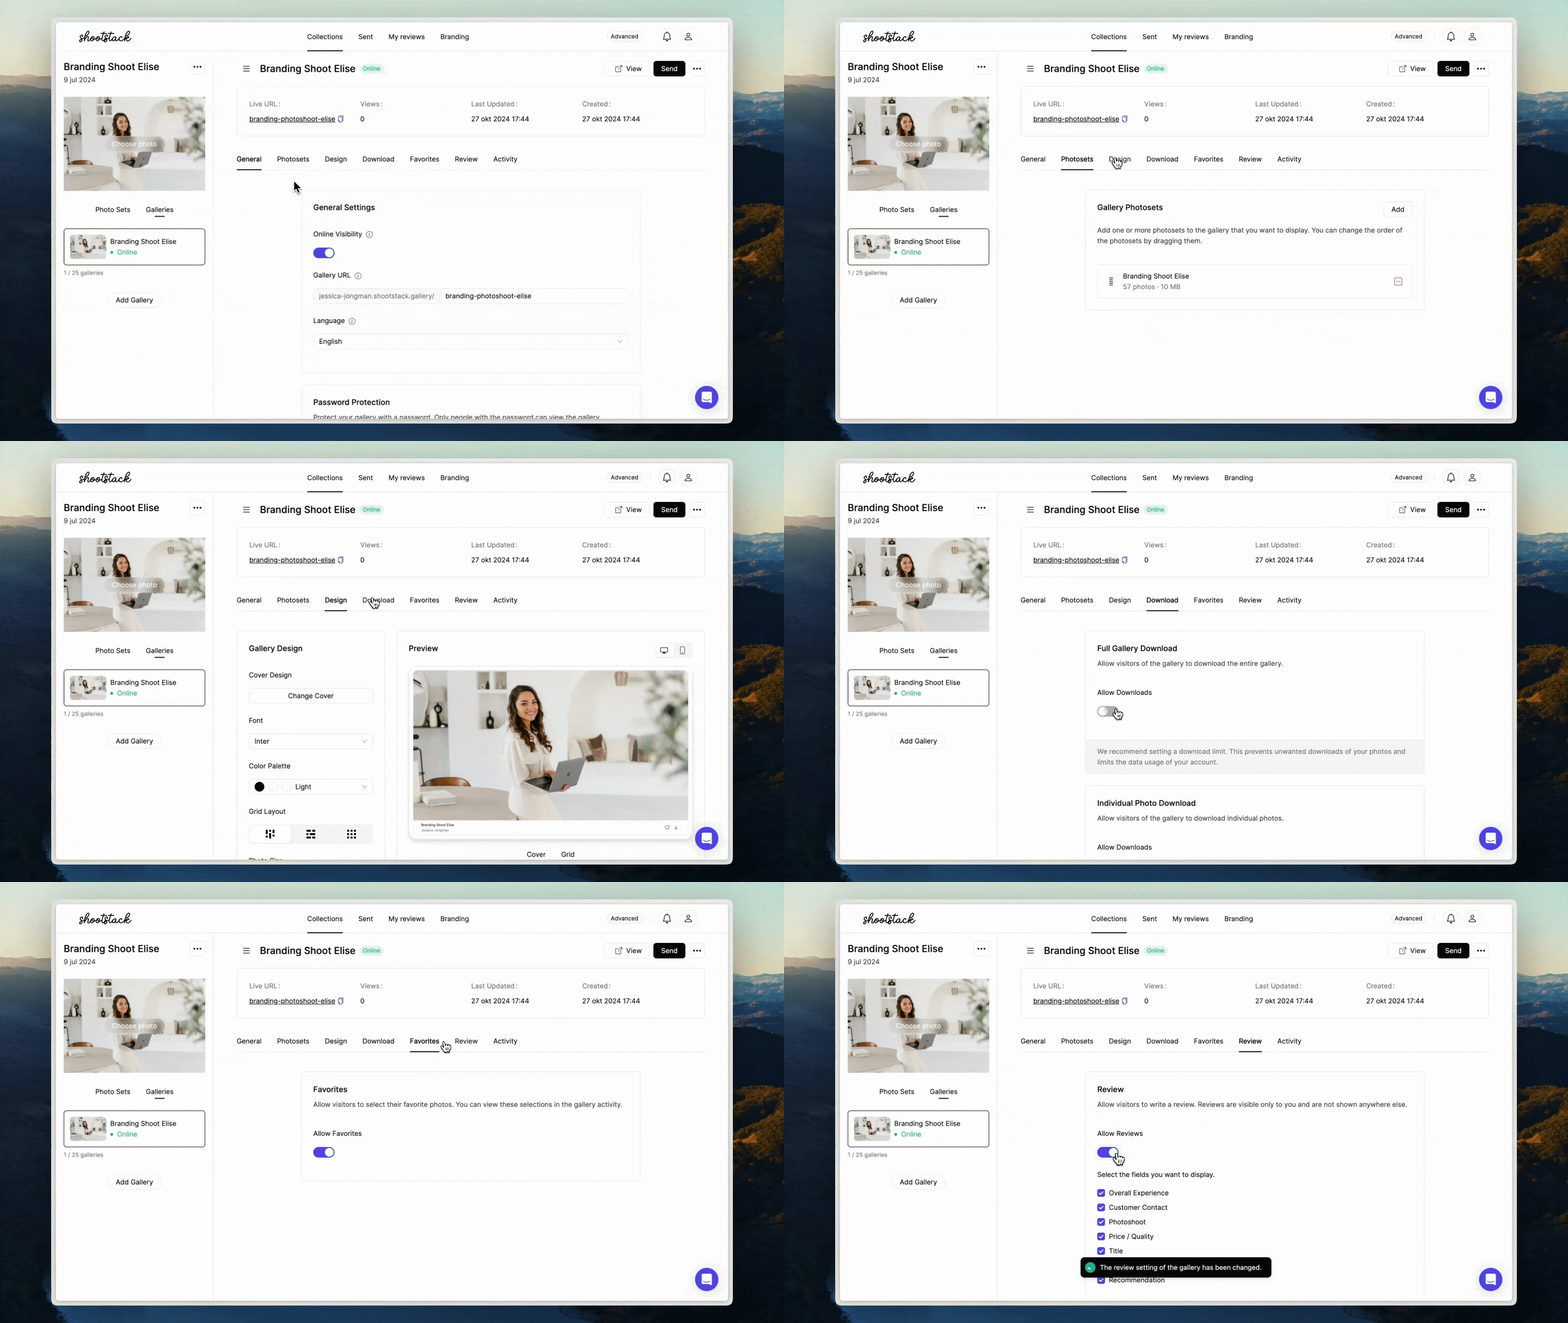
Nadat je alle foto’s hebt geüpload, is het tijd om je galerij in te stellen. Klik op het tabje Galerijen naast Fotosets om alle instellingen van je galerij aan te passen.
Om meer te leren over galerij instellingen, klik hier!

Voeg de juiste fotoset toe aan je galerij
Heb je een nieuwe fotoset aangemaakt en daar je foto's in geüpload? Zorg er dan altijd voor dat je de fotoset toevoegt aan je galerij, anders is deze niet zichtbaar. Ga naar het tabje Fotosets, klik op Toevoegen en selecteer je fotoset.
Je kunt op deze manier ook meerdere fotosets aan je galerij toevoegen of ze weer eenvoudig verwijderen zonder je foto's te hoeven verwijderen.

Bekijk je galerij
Klik op Bekijken om de galerij zelf even te bekijken voordat je deze verstuurt.
Je krijgt dan een Cloudflare scherm te zien. Dit is een beveiligingsmaatregel die je galerij beschermt tegen webscrapers en spam-bots.

Verstuur je galerij
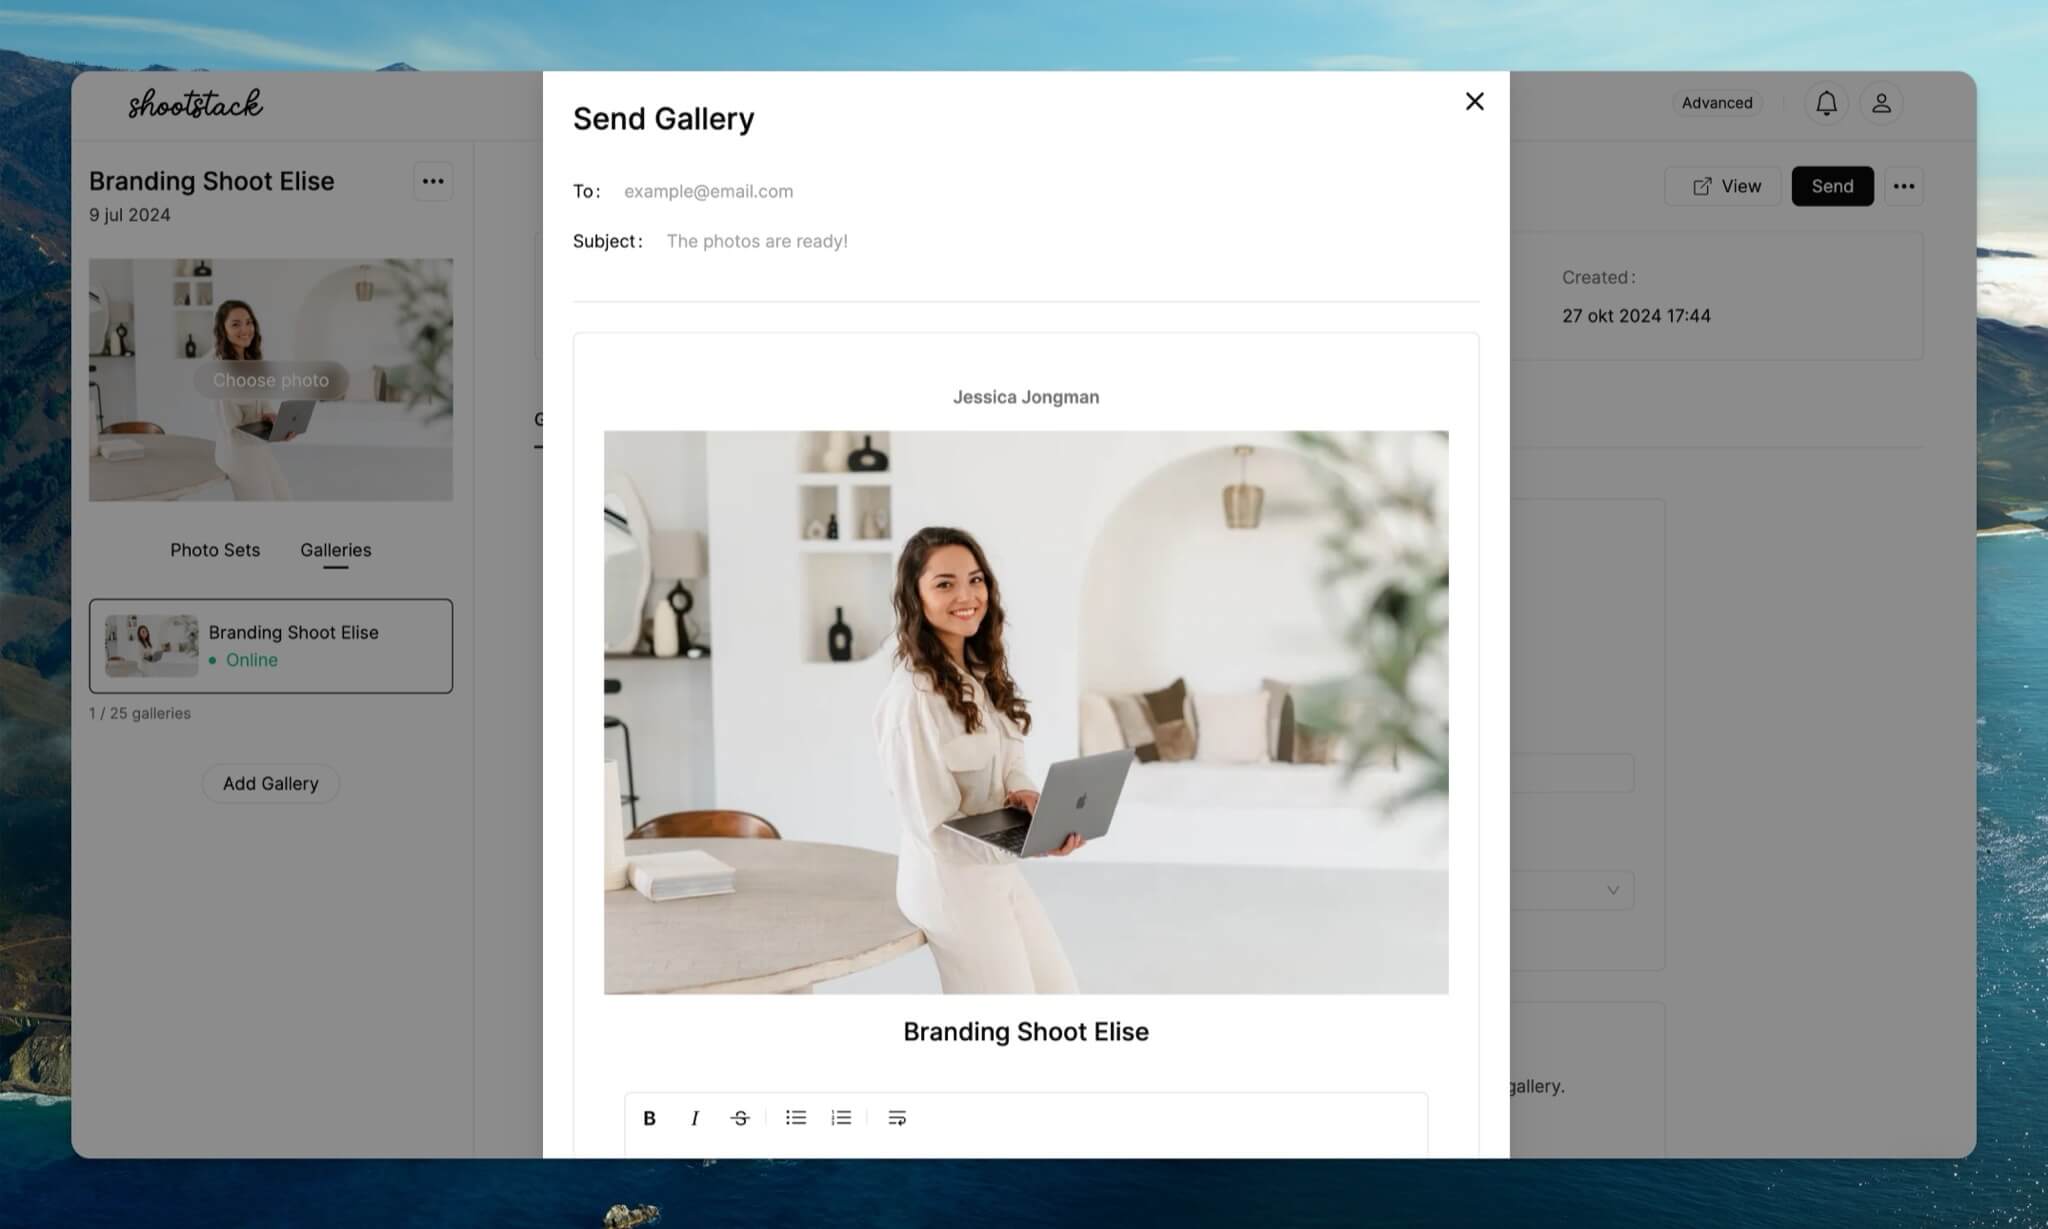
Ben je helemaal tevreden over hoe je galerij eruit ziet en alle instellingen? Dan is het tijd om de galerij te versturen naar je klant. Klik rechtsboven op de knop Versturen. Er wordt dan een mooi, vormgegeven email aangemaakt die je direct naar je klant kunt sturen.
Vul hier het emailadres van je klant in, het onderwerp en schrijf de email. De coverfoto van de galerij wordt automatisch weergegeven in de email. Als je een wachtwoord of download PIN hebt ingesteld, wordt deze automatisch aan de email toegevoegd.

Gefeliciteerd! Je hebt je eerste galerij succesvol aangemaakt en verstuurd. Wil je meer leren over specifieke workflows? Bekijk dan al onze guides.

